Your own private cloud
Updated: 2026.05.14
Safely store, sync and share your data
ownCloud is an open-source software product for the sharing and syncing of files. It supports online document editing and users can access data and documents through a web browser or a variety of client apps.
ownCloud lets you easily share files between devices like laptops and smartphones. Sharing files with friends is done with a few clicks from within the webportal or app, without them having to need an account on your ownCloud server to see or download the shared files.
To access the data stored on the server, the ownCloud software must be run on a computer connected to the internet, and should (ideally) be available all day. Having your data available at all time can be achieved while using (very) little power:
The Raspberry Pi, a small multipurpose computer which is generally available, is particularly well suited for the job. It has a very well developed and maintained software ecosphere, and a very low power consumption.


What is ownCloud
The ownCloud server is a platform for sharing files between devices and / or people. It serves as a central hub, where different kind of devices securely can connect to. It automatically syncs files across connected devices, and supports a variety of devices and operating systems. It also supports versioning of files. By using the webportal, files can be restored to a previous state.
However, the ownCloud server is not a suitable device for backing up data. A backup system will store different revisions of a file, on an external storage device. This way you can restore data from specific points in time (dependent on the backup schedule and retention settings). The ownCloud servers’ main purpose is making files accessible to other devices connected to the server / share data with other people.
For more information on ownCloud versioning, see the official documentation.
Before we continue
This guide will (hopefully) help you setup your own cloudserver, but it cannot cover all (specific for your situation) situations. So to prevent dissapointment please be aware that you will need some basic knowledge on Linux, DNS and networking to fill the gaps in this guide.
Then there’s also the (great) matter of security. You will need to keep your server up to date. Both the OS and the docker images will need attention, atleast every 4 weeks. Failing in doing so will greatly increase the risk of your system getting hacked and you data stolen / exposed. If you are not able or willing to do so, please abandon the idea of running your own cloudserver.
Let’s get started – The shopping list
The base installation
Installing an OS on the Pi
The first step is to provide the SDcard with an base OS. Download the Raspberry Pi Imager, select Raspberry Pi OS Lite Trixie (64bit) and your SDcard as Storage device. During the options phase, add your sshkey and the hostname of your Pi. When the image has been written and checked, it’s time to place the SD card in your Pi and boot the device.
When the device has booted up, the first step is to ssh into your device and update the OS and set basic firewall rules limiting access to your device.
Update Raspbian
    sudo apt update && sudo apt upgrade
sudo reboot
Install base software
sudo apt -y install chrony ufw vim mdadm
Basic Firewall settings
    ufw allow from 192.168.0.0/16 to any port 22 proto tcp # Allow ssh from your LAN (or change to your LAN IP Range
ufw allow http
ufw allow https
ufw enable

Setting up the storage
USB powered RAID 1 configuration
Keeping the data stored across two disks is a sensible idea to prevent dataloss during harddisk failure. The Raspberry Pi 5 can power two harddrives from its USB ports (according to specs) but I’ve been running into some incidental hickups during boot; The Pi can have trouble initializing the disks during the (simultaneous) spinning up of the disks. The Pi will boot, but might not recognize (one of) the attached USB disks.
I’ve created a small script which upon boot will check if the disks are initialized. If not, it will reset the individual USB 3.0 bus(ses) as needed, forcing reinitialization of the affected disk(s). If needed, it will also restart docker and ownCloud.
Implementing the startup script:
- Place the startup.sh -script (755) into /root/scripts/
- Place rc.local (755) into /etc
Update: Since the installation of firmware Mon Jan 27 13:08:59 UTC 2025 (1737983339), the harddisk initialization issue seems a thing of the past.

startup.sh
    #!/bin/bash

# Script for checking availability of USB harddrives. If a disk is not properly initialized, it resets the USB bus, restarting the initialization process.

output_sda=$(file -s /dev/sda)
output_sdb=$(file -s /dev/sdb)


if [[ $output_sda == *"empty"* ]]; then
    sda_restarted=1
    echo "Reinitializing sda"
    echo "0" > /sys/bus/usb/devices/2-1/authorized
    sleep 2
    echo "1" > /sys/bus/usb/devices/2-1/authorized
fi
if [[ $output_sdb == *"empty"* ]]; then
    sdb_restarted=1
    echo "Reinitializing sdb"
    echo "0" > /sys/bus/usb/devices/4-1/authorized
    sleep 2
    echo "1" > /sys/bus/usb/devices/4-1/authorized
fi

if [[ $sda_restarted -eq 1 && $sdb_restarted -eq 1 ]]; then
    echo "Both sda and sdb had to be restarted, reinitializing docker and starting owncloud..."
    systemctl stop owncloud
    systemctl restart docker
    systemctl start owncloud
fi
rc.local
    #!/bin/bash -e
/bin/bash /root/scripts/startup.sh
exit 0
Creating the RAID array
fdisk
mdadm
mkfs
Create RAID volume and mount
    sudo mkfs.ext4 /dev/md0
sudo mkdir /var/lib/docker
sudo echo '/dev/md0	/var/lib/docker	ext4	defaults,nofail  0  2' >> /etc/fstab
sudo mount /var/lib/docker
Installing Docker
Containers
Running ownCloud requires a database, a cache service and an (reverse) proxy for routing traffic between internet and the ownCloud server.
Having an domain available enables you to point a domainname towards your ownCloud server, like mycloud.mydomain.com. That’s also needed to use a legitimate TLS certificate, instead of an selfsigned certificate (which will be flagged as unsafe by pretty much all browsers, and probably refuse to connect to your server).
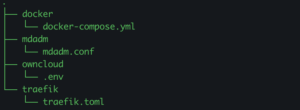
All required software will be run as containers in Docker. We’ll use MariaDB as database, Valkey for caching, Traefik as router / proxy and offcourse the ownCloud server itself. All will be configured using three files:
- docker-compose.yml
- .env (configuration file for docker-compose.yml)
- traefik.toml
Docker installation
    sudo echo " cgroup_enable=memory swapaccount=1 arm_64bit=1" >> /boot/firmware/cmdline.txt
sudo sysctl vm.overcommit_memory=1
sudo apt install ca-certificates curl
sudo install -m 0755 -d /etc/apt/keyrings
sudo curl -fsSL https://download.docker.com/linux/debian/gpg -o /etc/apt/keyrings/docker.asc
sudo chmod a+r /etc/apt/keyrings/docker.asc
sudo tee /etc/apt/sources.list.d/docker.sources <<EOF
Types: deb
URIs: https://download.docker.com/linux/debian
Suites: $(. /etc/os-release && echo "$VERSION_CODENAME")
Components: stable
Architectures: $(dpkg --print-architecture)
Signed-By: /etc/apt/keyrings/docker.asc
EOF
sudo apt update
Docker configuration files
Note: It is also possible to run rootless docker, which is safer. If you wish to do so, please follow the docker documentation. It will be implemented at a lated time in this guide as well.
Todo:
- Create a directory for all docker-related configuration files (for example: /root/owncloud/ if you are not running rootless docker).
- Check https://hub.docker.com for latest image versions and update docker-compose.yml accordingly
- Replace mycloud.mydomain.com -entries with your aquired and desired domainname.
/root/owncloud/docker-compose.yml
    volumes:
  files:
    driver: local
  mysql:
    driver: local
  valkey:
    driver: local

services:
  reverse-proxy:
    image: traefik:v3.6.17
    container_name: owncloud_traefik
    command: --api.insecure=false --providers.docker
    ports:
      - 80:80
      - 443:443
    volumes:
      - /var/run/docker.sock:/var/run/docker.sock:ro
      - ./traefik.toml:/traefik.toml:ro
      - /var/lib/docker/letsencrypt:/letsencrypt

  owncloud:
    image: owncloud/server:10.16.1
    container_name: owncloud_server
    labels:
      - "traefik.enable=true"
      - "traefik.http.routers.owncloud.entrypoints=websecure"
      - "traefik.http.routers.owncloud.rule=Host(`mycloud.mydomain.com`)"
      - "traefik.http.routers.owncloud.tls.certresolver=letsencrypt"
      - "traefik.http.routers.owncloud.tls=true"
      - "traefik.http.routers.owncloud.tls.options"
      - "traefik.http.routers.owncloud.middlewares=owncloud"
      - "traefik.http.middlewares.owncloud.headers.forceSTSHeader=true"
      - "traefik.http.middlewares.owncloud.headers.stsPreload=true"
      - "traefik.http.middlewares.owncloud.headers.stsIncludeSubdomains=true"
      - "traefik.http.middlewares.owncloud.headers.stsSeconds=31536000"
      - "traefik.http.middlewares.owncloud.headers.contentTypeNosniff=true"
      # Ratelimit to 200 reqs/s
      - "traefik.http.middlewares.owncloud-ratelimit.ratelimit.average=200"

    restart: always
    ports:
      - 8080:8080
    depends_on:
      - mariadb
      - valkey
    environment:
      - OWNCLOUD_DOMAIN=${OWNCLOUD_DOMAIN}
      - OWNCLOUD_TRUSTED_DOMAINS=mycloud.mydomain.com
      - OWNCLOUD_DB_TYPE=mysql
      - OWNCLOUD_DB_NAME=owncloud
      - OWNCLOUD_DB_USERNAME=${MYSQL_USER}
      - OWNCLOUD_DB_PASSWORD=${MYSQL_PASSWORD}
      - OWNCLOUD_DB_HOST=mariadb
      - OWNCLOUD_ADMIN_USERNAME=${ADMIN_USERNAME}
      - OWNCLOUD_ADMIN_PASSWORD=${ADMIN_PASSWORD}
      - OWNCLOUD_MYSQL_UTF8MB4=true
      - OWNCLOUD_REDIS_ENABLED=true
      - OWNCLOUD_REDIS_HOST=valkey
    healthcheck:
      test: ["CMD", "/usr/bin/healthcheck"]
      interval: 30s
      timeout: 10s
      retries: 5
    volumes:
      - files:/mnt/data

  mariadb:
    image: mariadb:11.8.6
    container_name: owncloud_mariadb
    restart: always
    environment:
      - MARIADB_AUTO_UPGRADE=1
      - MARIADB_DISABLE_UPGRADE_BACKUP=0
      - MYSQL_ROOT_PASSWORD=${MYSQL_ROOT_PASSWORD}
      - MYSQL_USER=${MYSQL_USER}
      - MYSQL_PASSWORD=${MYSQL_PASSWORD}
      - MYSQL_DATABASE=owncloud
    command: ["--max-allowed-packet=128M", "--innodb-log-file-size=64M"]
    healthcheck:
      test: ["CMD", "mysqladmin", "ping", "-u", "root", "--password=${MYSQL_ROOT_PASSWORD}"]
      interval: 10s
      timeout: 5s
      retries: 5
    volumes:
      - mysql:/var/lib/mysql

  valkey:
    image: valkey/valkey:9.0.4
    container_name: owncloud_valkey
    restart: always
    command: ["--databases", "1"]
    healthcheck:
      test: ["CMD", "redis-cli", "ping"]
      interval: 10s
      timeout: 5s
      retries: 5
    volumes:
      - valkey:/data
Create variables-file for docker compose
To keep variables data out of the docker template as much as possible, we’ll create an .env file where all these values will be kept.
Note for using usernames and credentials:
-
ADMIN_USERNAME should be something not easy to guess (For example, use something like PU8243397)
-
ADMIN_PASSWORD is the initial password. As soon als you are able to login into the webport, this should be changed.
- MYSQL_ROOT_PASSWORD should be a long password (25 characters or up) without special characters. Use letters and numbers only.
-
MYSQL_USER unguessable username, again without special characters. Letters and numbers only
-
MYSQL_PASSWD should be a long password (25 characters or up) without special characters. Use letters and numbers only.
/root/owncloud/.env
    OWNCLOUD_DOMAIN=localhost:8080
ADMIN_USERNAME=<your_ownCloud_admin_username>
ADMIN_PASSWORD=<your_ownCloud_very_strong_adm_password>
MYSQL_ROOT_PASSWORD=<your_password_without_special_characters>
MYSQL_USER=<your_sql_username_without_special_characters>
MYSQL_PASSWORD=<your_password_without_special_characters>
Create traefik configuration file
Traefik handles the incoming traffic from the internet, and routes it to the ownCloud container.
Todo:
- Replace [email protected] with your valid emailadres.
- The caServer = “https://acme-staging-v02.api.letsencrypt.org/directory” -entry is an Let’s Enrypt Staging environment for you to test. The Let’s Encrypt staging environment doesn’t have an ratelimit and can serve you in all your testing needs. When all is in good order we’ll change this so traefik connects to the live API and gets a real certificate. We’ll get to that later.
/root/owncloud/traefik.toml
    ## STATIC CONFIGURATION
[log]
  level = "DEBUG"

[core]
  defaultRuleSyntax = "v2"

[entryPoints]
  [entryPoints.web]
    address = ":80"

  [entryPoints.web.http.redirections.entryPoint]
    to = "websecure"
    scheme = "https"

  [entryPoints.websecure]
    address = ":443"

[providers]
  [providers.file]
    filename = "traefik.toml"

[tls.options]
  [tls.options.default]
    minVersion = "VersionTLS12"
    cipherSuites = [
      "TLS_ECDHE_ECDSA_WITH_CHACHA20_POLY1305_SHA256",
      "TLS_ECDHE_RSA_WITH_CHACHA20_POLY1305_SHA256",
      "TLS_ECDHE_ECDSA_WITH_AES_256_GCM_SHA384",
      "TLS_ECDHE_RSA_WITH_AES_256_GCM_SHA384"
    ]
    sniStrict = true
    curvePreferences = [
      "CurveP521",
      "CurveP384"
    ]

[certificatesResolvers.letsencrypt.acme]
  caServer = "https://acme-staging-v02.api.letsencrypt.org/directory"
  keyType = "EC384"
  email = "[email protected]"
  storage = "/letsencrypt/acme.json"
  [certificatesResolvers.letsencrypt.acme.tlsChallenge]

[providers.docker]
  exposedByDefault = false
Networking and DNS
It is time to make sure your server is accessible from the internet, using your domain name. OwnCloud will only use https traffic, so you will need to access your router and configure a portforward which will route traffic originating from the internet to your router on TCP port 443 to your ownCloud server’s internal IP address on port TCP 443.
Setup DNS
To setup DNS, you will need to login into your dns registar’s portal, and:
- Create an “A record” – This is pointing your desired domain name to your routers’ internet-IP
- Create an “CAA record” – This states which certificate authority (we’ll use Let’s Encrypt) is allowed to issue certificates for your domain
- Login to your router
- Look for portforwarding / reverse NAT
- Create a rule allowing traffic from the internet on port 443 TCP to your ownCloud server’s LAN IP address to port 443 TCP
- Make sure there is no firewall rule preventing the connection to TCP 443
Initial testing
Next up is testing the configuration of the Raspberry Pi, your router’s portforward and your configured dns configuration.
Start ownCloud
Login to ownCloud server as root, and from the directory containing the docker files run docker compose up -d
When running docker compose for the first time, it will need to download all images (owncloud / mariadb / traefik and valkey) so this might take some time. Use docker stats and as soon containers are starting, you can run docker logs -f <container id> to see the log output of that container. I would start inspecting the ownCloud container, because if that started correctly, valkey and mariadb started as well. If all four containers are running, it is time to check connectivity with your browser on your LAN.
Browser LAN test
Try connecting with your browser (disable proxy, if needed) to the LAN IP addres of the ownCloud server.
Browser web test
Connect to configured hostname
Install base software
- Ipadress, reverse NAT, Domain name, CAA record
- Test base setup
- Systemctl service files
- Logrotate
- Login, set new admin passwd, mfa
- Enable ownCloud data encryption
- rsalabs
- Enable “live” let’s encrypt certificate setting